Most blogs talk about the Everest Base Camp (EBC) trail, the challenges, and the acclimatization process. But the Everest Three Passes Trek acclimatization needs even more consideration due to its high difficulty compared to the Everest Base Camp Trek. During the trek, you’ll cross not only one but three high-altitude mountain passes: Kongma La, Cho La, and Renjo La. They are all above 5,300 meters, and crossing these between long trekking days and dry air is definitely challenging for most people. Thus, you need to be more than just physically fit for the Everest Three Pass trek itinerary. You need to know the route and everest three passes acclimatization plan that matches each village, valley, and pass.
To solve this problem, this blog will guide you about the stops and how to acclimate to the Three Passes. The major stops are at Namche, Dingboche, and Gokyo, but you adapt quietly while walking in between other sections of the trek, too. We also compare EBC vs. Three Passes so trekkers familiar with Base Camp can know what to expect. Lastly, we will wrap up with universal high-altitude tips for any Himalayan peak linkup or extension to help you complete the trek comfortably.
By following this guide, you can master the acclimatization strategy on the full 18-day Everest Three Passes Trek. You’ll feel stronger on the passes, recover better overnight, and significantly reduce the risk of altitude sickness or injury.
Understanding Acclimatization During the Everest Three Passes Trek

Acclimatization is the process of letting your body gradually adapt to lower oxygen levels at higher altitudes. Once you are above 2,500 meters, barometric pressure drops enough that each breath delivers less oxygen to your bloodstream. That’s why trekking in mountainous regions carries the risk of AMS (Acute Mountain Sickness). Furthermore, trekkers also suffer from HAPE (High-altitude Pulmonary Edema) and HACE (High-altitude Cerebral Edema) if AMS isn’t treated in time.
On the Everest Three Passes trek, you’ll spend multiple days above 4,500 meters and cross three high passes, each over 5,300 meters. At these altitudes, available oxygen drops sharply: roughly ~70–75% of sea-level equivalent at Lukla (2,860 m), ~60–62% around Dingboche (4,410 m), and ~53–55% when you reach around Gokyo (4,790 m). That’s why this route demands a well-structured acclimatization, unlike a basic EBC plan.
You’ll follow two core principles on this gradual, but long trek to the three passes in EBC. They are:
- Climb high, sleep low: This is a technique used to adjust to higher altitudes. You hike to a higher point during the day, then return to a lower altitude to sleep. This helps your body get used to the thinner air gradually and prevents altitude sickness.
- Active rest: This means resting without being completely inactive. It includes light activities like short walks or stretching. You should also drink plenty of water and keep your body moving gently so your Everest Three Passes Trek acclimatization continues smoothly on rest days.
At Himalaya Guide Nepal, we have designed the Three High Passes trek itinerary (Lukla → Namche → Dingboche → Lobuche/Chukhung side trips → Gokyo) to increase altitude gradually and build in acclimatization windows naturally. As long as you follow the plan, listen to your guide, and treat minor symptoms early, you can cross the passes without any altitude-related problems.


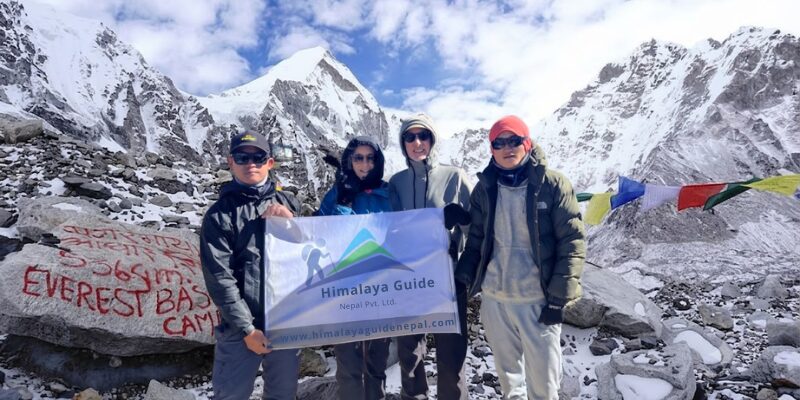
The Everest Base Camp trek is one of the most popular treks in Nepal. The trek is more frequently visited than other popular treks, such as the Annapurna Base Camp Trek or the Langtang Valley Trek, which are also well-known among trekkers worldwide. The trek is on the bucket list for many trekkers to reach the base of the world’s highest peak, Mount Everest. Everest Base Camp trek begins with a Kathmandu to Lukla flight & provides a challenging Himalayan & Sherpa village experience costing you $955. The paths twist and turn through beautiful Sherpa villages, high rhododendron forests, and alongside the Dudh Koshi River, offering glimpses of the local culture and the strong presence of the local people.

As the altitude gradually increases from Lukla, you will pass through Namche, Tengboche, and Dingboche. During this trek, trekkers need to acclimatize to the conditions of the Khumbu region. During these treks, trekkers will enjoy stunning views of mountains such as Everest, Ama Dablam, Nuptse, Lhotse, and Cho Oyu. The final section of your walk takes you to Gorak Shep, the last place before you reach Everest Base Camp, at an altitude of 5,364 meters. From Gorak Shep, you will walk to the highest point of the trek, at 5,644 metres, Kala Patthar. This is a rewarding trek, one that provides an immense sense of accomplishment and offers wonderful views of Mount Everest and the Khumbu Icefall up close, which will stay with you forever.
Everest Base Camp Trek Cost [Updated Cost]The Everest Base Camp Trek costs $1,1275 per two person for a standard group booking. This per-person rate decreases as group size increases, dropping to around $955 per person for groups of 10 or more, since fixed costs like guide and porter wages get shared across more trekkers.
| Category | Description | Estimated Cost (USD) | Factors Influencing Cost |
|---|---|---|---|
| Permits | Fees are required to trek in the Everest region. | $50 – $60 |
|
| Transportation | Costs to reach the trek starting point (usually Lukla) and return to Kathmandu. | $360 – $460 |
|
| Accommodation | Cost of staying in tea houses/lodges along the trekking route and hotels in Kathmandu. | $150 – $500+ |
|
| Food & Drinks | Expenses for meals (breakfast, lunch, dinner) and beverages during the trek. | $250 – $500+ |
|
| Guides | Fees for hiring a licensed trekking guide. | $500 – $1000+ |
|
| Trekking Gear | Costs for essential trekking equipment. | $100 – $500+ (if renting) / $300 – $2000+ (if buying) |
|
| Visa | Nepal entry visa fees. | $30 – $125 |
|
| Travel Insurance | Mandatory insurance that covers medical emergencies, high-altitude sickness, and emergency evacuation (including helicopter rescue). | $100 – $300+ | Cost depends on the duration of the trek and the coverage provided by the insurance policy. Ensure it specifically covers trekking at altitudes up to 6,000 meters. |
| Miscellaneous | Personal expenses such as hot showers, Wi-Fi, charging electronic devices, snacks, souvenirs, and tips for guides and porters. | $100 – $300+ |
|
How the Route Supports Everest Three Passes Trek Acclimatization
The Everest 3 passes journey starts with a flight from Kathmandu (1,300 m) to Lukla (~2,860 m). From there, you begin trekking. Some trekkers already get heavier breaths on this stretch to Phakding (2,640 m). On the 2nd day of trekking from Phakding to Namche (3,440 m), you’ll gain a significant altitude of about ↑ 830 M for the first time. Thus, you take a full rest day in Namche to help your body adjust to the altitude. You can explore Namche itself or the nearby Khumjung village. After that, the next acclimatization stops will be at Dingboche (4,410 m) and Gokyo (4,790 m).
Now, you might be wondering how this itinerary plan is effective for proper acclimatization. Here’s how it works:
- Gradual sleep-altitude gain: Our itinerary aims for a net sleeping-altitude increase of < 500 m per day once you’re above 3,000 meters. This pacing reduces AMS risk and improves sleep quality and appetite.
- Strategic rest stops: Staying at Namche, Dingboche, and Dzonglha (4,830 m) in the early and mid sections provides active recovery days just before the Kongma La and Cho La passes. Towards the end of the trek, you stay at Gokyo for two nights to prepare for Renjo La.
- Intentional “mini-exposures”: We also include optional hikes to Everest View Hotel, Khumjung, Nagarjun Hill, Chhukung Valley, and Gokyo Ri, along the trek, so that you can naturally accelerate adaptation.
For a more detailed day-by-day itinerary and acclimatization plan, check out our Everest Three Pass Trek Itinerary.
Key Acclimatization Points Along the Everest Three Passes Trek

During the 18-day Three Passes Trek, there are three acclimatization days. You spend these days at Namche, Dingboche, and Gokyo in order. It also includes small “micro-acclimatization” moments that help your body adjust safely without extra days. Understanding the distance of the Everest Three Passes Trek will help decide acclimatization points better and make your journey a successful one
Namche Bazaar (3,440 m): The First Major Adjustment
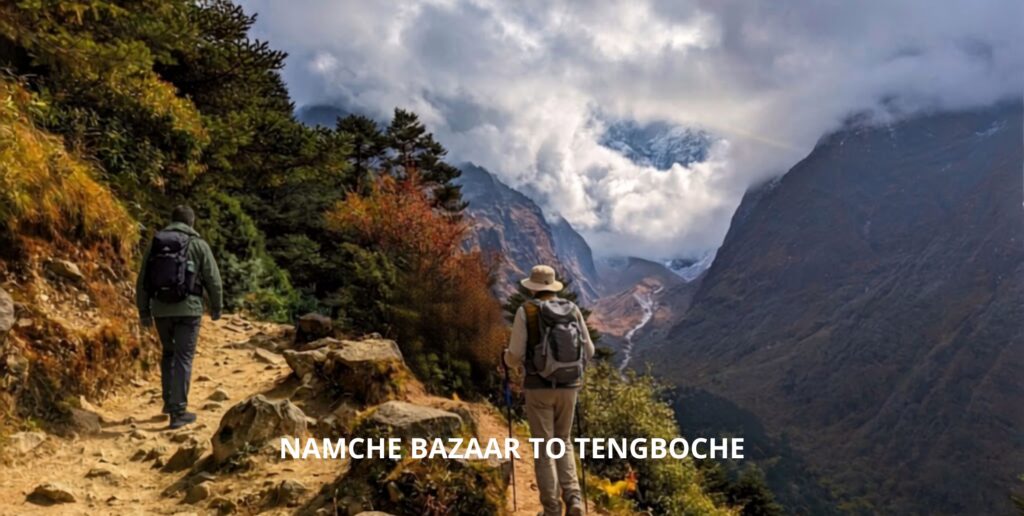
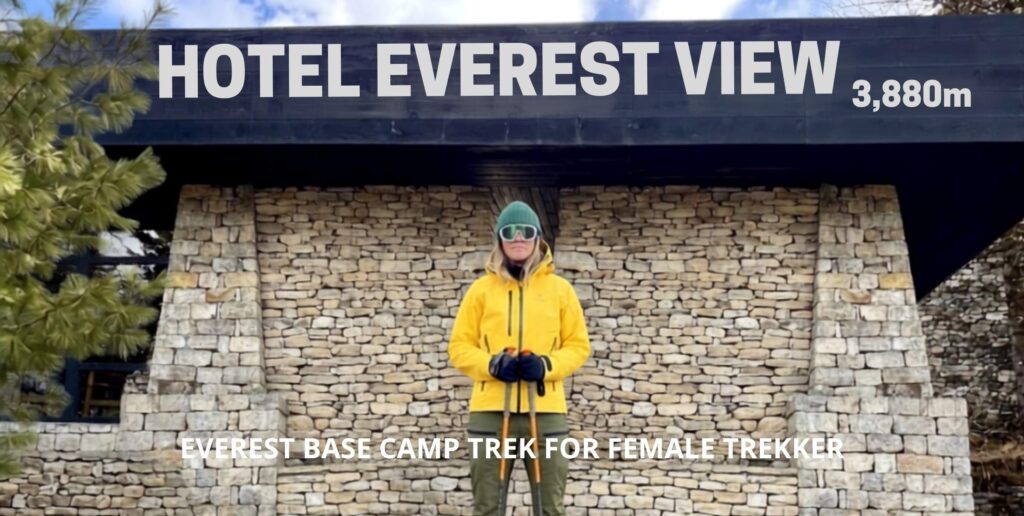
On day 4 of the Everest three passes trek, you spend a whole day at Namche, a true acclimatization stop. Here, you can practice climb high, sleep low by hiking to the Everest View Hotel (3,880 m) or Khumjung and visiting the Hillary School and Sagarmatha National Park Museum. You may feel the thin air, but it’s comfortable enough for an easy 2–3 hour acclimatization hike with active rest.
During your time here, keep your pace conversational. You should stay well-hydrated and eat more than you feel like eating. After all, the altitude may suppress your appetite, but you still need energy. You can enjoy Wi-Fi, cafes, and bakeries, but skip alcohol and coffee. They dehydrate your body. And if you get morning headaches or poor sleep, you can hike to just nearby places. Don’t go too high that day. The goal here is just to trigger adaptation without overreaching. This sets you up for the smoother push toward Tengboche, Pangboche, and ultimately Dingboche.
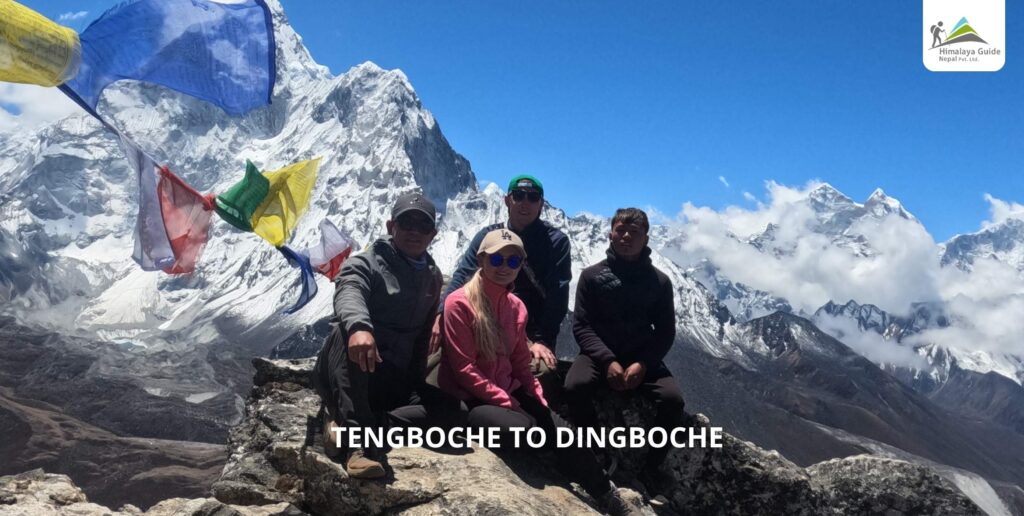
Dingboche (4,410 m): Preparing for the High Passes
As you near the hardest mountain challenge of Kongma La pass, you stop at Dingbocheon day 7. On this day, you can choose between Nagarjun Hill (~5,100 m) for a greater elevation gain or the gentler Chhukung Valley (~4,730 m). The landscape at Dingboche is dry but windy. However, available oxygen sits near ~60–62% of sea level, so hydrating and pacing well become non-negotiable.
You can treat this stop as the gateway to high-altitude trekking. Because from here onwards, you have to wear more layered clothing to avoid chilly winds. You also have to use your crampons and gloves. Make sure you eat enough before the first pass day. If you struggle with appetite, eat soups, dal bhat, and warm fluids. They are easier to digest. You can also do light stretching in the evening to improve sleep quality and reduce stiffness the next day.
Gokyo (4,790 m): Gentle Acclimatization Before Renjo La
Arriving from Dragnag (4,700 m) to Gokyo (4,790 m) gives you a half-day recovery window and then two nights to settle on days 12 and 13 of the Everest 3 passes trek. You will trek to the beautiful summit of Gokyo Ri (5,357 m) as an active-recovery spike before Renjo La. The oxygen levels here are much lower than at Dingboche, so keep the pace steady and descend slowly to sleep at Gokyo.
The Gokyo Ri hike not only helps with acclimatization but also helps you psychologically. Watching the Gokyo’s turquoise lakes and expansive views of the mountains motivates you. Thus, suchmental freshness also plays a vital role in the acclimatization process. Since you’re crossing the final pass next, you can spend your afternoon time checking gear (microspikes, buff, goggles) and preparing.
Micro-Acclimatization and Active Recovery Along the Trail

Micro-acclimatization is the small, repeated exposure to higher altitude built into regular trekking days. These short climbs gently push your body to adapt without overstraining it. A couple of good examples on this trek are: Phakding to Namche (Day 3). It is also your first long climb, which increases breathing and kick-starts adaptation while still sleeping lower than your daytime height. Another example is the Gokyo Ri side hike, where you briefly go above 5,300 meters and then sleep around 4,790 meters.
These short exposures help your body improve oxygen flow day by day. They also let you notice early symptoms likeheadache, nausea, or unusual tiredness. Spotting these symptoms early is very important so your guide can slow down the pace, give breaks when needed, or take other necessary precautions. Besides this, micro-acclimatization boosts stamina, reduces overall fatigue, and improves sleep quality at higher altitudes. Hence, it helps your body adjust more smoothly to big climbs later in the trek.
Here’s how you naturally include micro-acclimatization throughout the day. First, start slowly from the villages. Between trekking hours, take short photo or water breaks to keep the heart rate steady. After reaching at the teahouse, allow your body to cool down gently before having dinner. This rhythm is just as important as the big rest days. It can make the difference between reaching a peak feeling ready or arriving exhausted.
Why Acclimatization Matters More on the Everest Three Passes Trek Than EBC

If you’ve ever trekked to EBC before, you know that the highest point on the trek is around 5,364 meters. Additionally, it follows a classic out-and-back rhythm and has predictable rest days. In contrast, the Three Passes route stacks multiple days above ~4,700 meters. More importantly, it includes three crossings above 5,300 meters, and glacial and rocky terrain that costs additional energy. Thus, you get cumulative altitude fatigue, a slow drain from extended hypoxia, poor sleep, and appetite fluctuations.
The route to the Three-Pass trek starts on the main EBC trail up to Namche Bazaar. From there, you follow a lesser-traveled route that connects Everest’s three passes with Everest Base Camp and Kala Patthar. The Three Passes trek is also longer in comparison and loops around the base camp. It keeps you high for longer, with less time at mid-altitudes. You still rest (Namche, Dingboche, Gokyo), but the work between rests is bigger and colder, especially over Kongma La and Cho La. Furthermore, unpredictable weather and trail conditions are rougher on the way to the three passes.
Most trekkers are surprised by how taxing the Three Passes becomes after the second high pass, Cho La, the most technical of the three. To tackle them, you need to have good physical fitness and strong determination. A smarter acclimatization plan directly equals a better chance of success on the Everest Three High Passes trek and improves the overall trekking experience.
If you haven’t done any of the treks like the Everest Base Camp Trek and can’t seem to choose between them, you can read the blog on: Everest Base Camp vs. Three Passes: Which Adventure to Choose?
The Science and Physiology Behind Acclimatization
At high altitudes, the density of air decreases. As a result, the body immediately begins a process of acclimatization to deliver enough oxygen to the tissues. Here’s what will happen in your body once you’re above 2,500 meters:
- Increased breathing and heart rate: You breathe and heartbeat become faster and deeper to deliver oxygen efficiently and remove excess carbon dioxide.
- Red blood cell production: Over days, your kidneys release erythropoietin (EPO) to increase red blood cells and improve oxygen transport.
- Muscle and metabolic adjustments: Mitochondria and enzymes in muscles adapt to use oxygen more efficiently. This helps to maintain energy and pace over long trekking days.
Thus, you should take rest days in between to stabilize these changes before ascending higher, preventing fatigue and altitude sickness. Even acclimatized trekkers can lose efficiency if they climb too quickly, as the body lags behind sudden altitude gains. In short, you should follow the determined pace even if you’re feeling energetic.
Practical Acclimatization Tips for the Everest Three Passes and Other High-Altitude Treks

Before the specifics, remember: every high-altitude itinerary, from Three Passes to peak extensions, depends on respecting sleep altitude, hydration, and symptom honesty. If you’re pairing this route with an alpine add-on, see Lobuche Peak with Everest Three Passes Trek for how climbers sequence acclimatization and summit windows.
Trekking-Specific Practices
- Drink 3–4 liters of fluids every day. Mix water, tea, and soup, and add electrolytes if you can.
- Eat often, especially carbohydrates, because they give energy at high altitude.
- Walk at a pace where you can talk comfortably. Save extra effort for pass days.
- On rest days, do short hikes 300–500 m above your lodge, then come back down to sleep.
- Keep moving gently on rest days with easy walks, stretching, and foot care. Avoid staying in bed all day.
- Don’t drink alcohol or smoke. Caffeine is fine in moderate amounts if you usually drink it.
- For better sleep, wear warm clothes, use earplugs if needed, and do light stretching. Being cold will make it hard to sleep and adjust to changes.
Universal High-Altitude Advice
The following principles apply broadly to the Annapurna Circuit, the Andes, or any 5,000–6,000 m objective. If you plan an island-style peak extension, see Island Peak with the Everest Three Passes Trek for how acclimatization dovetails with a summit push.
- Know early AMS signs like headache, nausea, appetite loss, dizziness, and unusual fatigue. Tell your guide immediately if any of these symptoms appear.
- Carry recommended meds: You may carry Acetazolamide (Diamox), consulting with your guide/doctor. Consider ibuprofen for headaches, and use it responsibly.
- Monitor SpO₂ with a pulse oximeter, but don’t solely rely on it. Watch out for the physical symptoms instead.
- If symptoms worsen on ascent, do not go higher. You should descend and reassess the situation.
- You can apply the buddy system, where fellow trekkers monitor each other for early symptoms of altitude sickness because your trekking partner may notice changes in your behavior or coordination that you do not.